Run the REST Version of Spring PetClinic with Angular and Distributed SQL on GKE
August 20, 2020
Java developers know that Spring Data makes it easy to use data access technologies, relational and non-relational databases, map-reduce frameworks, and cloud-based data services. When YugabyteDB is combined with Spring, Java developers are able to leverage their familiarity with PostgreSQL while gaining the added benefits of distributed SQL. These “out-of-the-box” benefits include geo-data distribution, high performance, and horizontal scalability, which are impossible or difficult to achieve with monolithic SQL databases. To demonstrate just how easy it is to get started with Spring and YugabyteDB, we’ve put together this simple tutorial using examples which should be very familiar to both the novice and expert Spring developer.
In this blog post we’ll walk you though the following steps:
- Install a 3 node YugabyteDB cluster on Google Kubernetes Platform
- Deploy a REST version of the Spring PetClinic sample application
- Configure an Angular frontend for the Spring PetClinic
- Basic testing using Swagger and the Angular UI
Step 1: Install YugabyteDB on a GKE Cluster using Helm 3
In this section we are going to install YugabyteDB on the cluster. The complete steps are documented here. We’ll assume you already have a GKE cluster up and running as a starting point.
$ helm repo add yugabytedb https://charts.yugabyte.com
Now, fetch the updates.
$ helm repo update
Create a namespace. In this case we’ll call it yb-demo.
$ kubectl create namespace yb-demo
Expected output:
namespace/yb-demo created
We are now ready to install YugabyteDB. In the command below we’ll be specifying values for a resource constrained environment.
$ helm install yb-demo yugabytedb/yugabyte \
--set resource.master.requests.cpu=1,resource.master.requests.memory=1Gi,\
resource.tserver.requests.cpu=1,resource.tserver.requests.memory=1Gi,\
enableLoadBalancer=True --namespace yb-demo --wait
To check the status of the cluster, execute the below command:
$ kubectl get services --namespace yb-demo
![]()
Note the external-IP for yb-tserver-service which we are going to use to establish a connection to YugabyteDB. From the screenshot above we can see that the IP is 35.224.XX.XX and the YSQL port is 5433.
Step 2: Create the petclinic database and set a password
Let’s create a dedicated database called petclinic for our application. To connect to the YSQL service run the following command:
$ kubectl exec -n yb-demo -it yb-tserver-0 -- ysqlsh -h yb-tserver-0.yb-tservers.yb-demo
Next, create the petclinic database and connect to it using the following commands:
yugabyte=# CREATE DATABASE petclinic;
yugabyte=# \c petclinic;
By default, a YugabyteDB installation doesn’t have a password setup for the default yugabyte user. Specifying one is done the same way you’d do it in PostgreSQL.
petclinic=# ALTER ROLE yugabyte WITH PASSWORD 'password';
Step 3: Install and configure the REST version of Spring PetClinic
In step 3 we’ll be working locally. For the purposes of this demo, I am on a Mac. First up we’ll need to clone the PetClinic application.
$ git clone https://github.com/spring-petclinic/spring-petclinic-rest.git
Next, navigate to ~/spring-petclinic-rest/src/main/resources/.
—
Recall that YugabyteDB is PostgreSQL wire compatible, so it will leverage all of the application’s existing PostgreSQL connectivity and databases scripts.
—
In the application.properties file you’ll want to specify postgresql as the database and set the database initialization to always.
spring.profiles.active=postgresql,spring-data-jpa
server.port=9966
server.servlet.context-path=/petclinic/
spring.messages.basename=messages/messages
spring.datasource.initialization-mode=always
logging.level.org.springframework=INFO
petclinic.security.enable=false
In the application-postgresql.properties file you’ll want to uncomment the init database block and modify the database connectivity string, plus user credentials. For example:
spring.datasource.initialize=true
spring.datasource.schema=classpath*:db/postgresql/initDB.sql
spring.datasource.data=classpath*:db/postgresql/populateDB.sql

spring.datasource.url=jdbc:postgresql://35.224.XX.XX:5433/petclinic
spring.datasource.username=yugabyte
spring.datasource.password=password
spring.datasource.driver-class-name=org.postgresql.Driver
spring.jpa.database=POSTGRESQL
spring.jpa.database-platform=org.hibernate.dialect.PostgreSQLDialect
spring.jpa.hibernate.ddl-auto=none
Step 4: Run the PetClinic application
You can now run the application with the following commands:
cd spring-petclinic-rest
./mvnw spring-boot:run
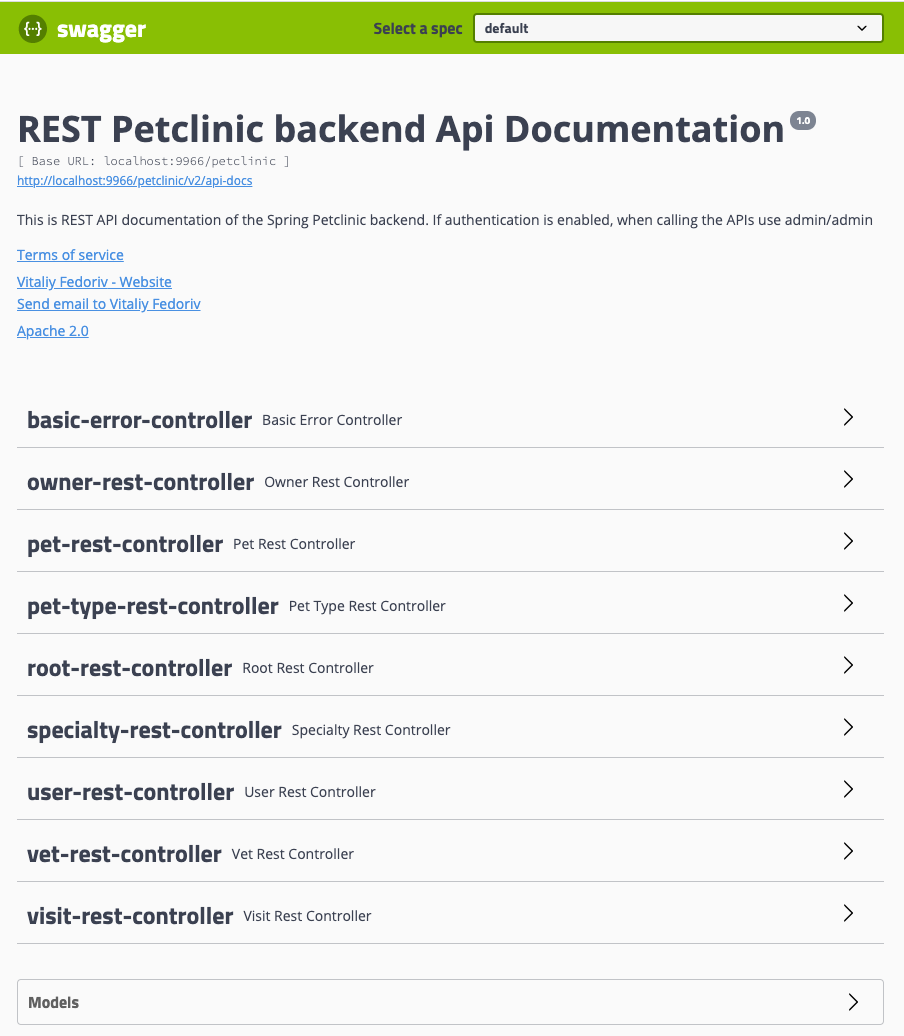
Navigate to https://localhost:9966/petclinic/swagger-ui.html to view the Swagger REST API documentation for the app. You should see something similar to this.
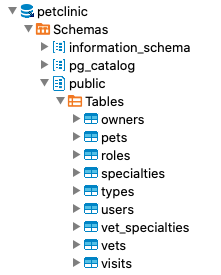
We can also jump back over to the YugabyteDB command line and execute PostgreSQL’s familiar \dt command or view the PetClinic tables in a UI like DBeaver. You should see 9 new tables created.
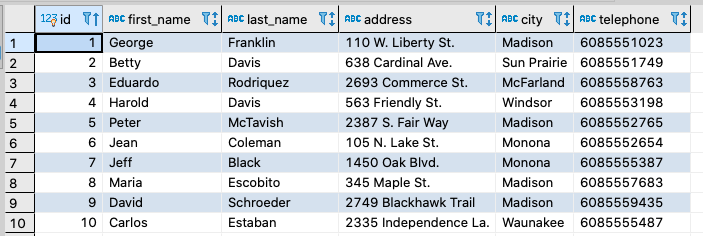
You can also issue a simple SELECT statement or use a UI to view the data that ends up populating the tables by default.
Step 5: Configure an Angular frontend
To get an Angular frontend for our PetClinic application we’ll make use of the project that can be found here. Again we’ll be working locally on a Mac.
Note: You should be running a current version of the angular-cli.
Clone the project from GitHub.
$ git clone https://github.com/spring-petclinic/spring-petclinic-angular.git
Install the local project package.
$ npm install
Bring up a development server.
$ ng serve
Now, navigate to https://localhost:4200/. Note: The application will automatically reload any changes to source files. You should now see something similar to this:
Step 6: Simple data manipulation in Angular
Next, navigate to https://localhost:4200/petclinic/owners and click on “Add Owner” to add a new owner.
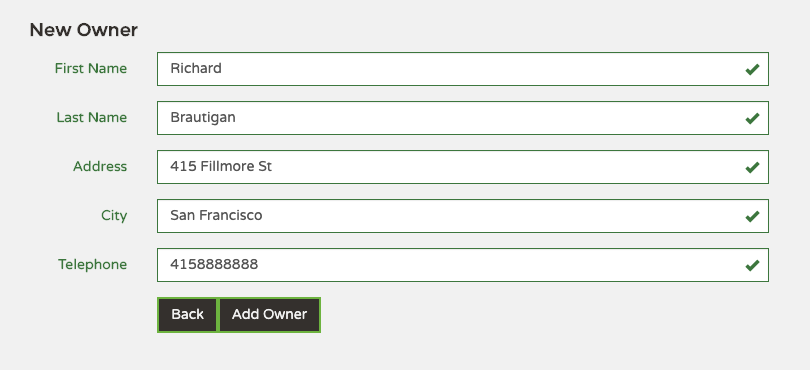
We should now see this new owner in the UI. This means we’ve successfully written to the YugabyteDB cluster.
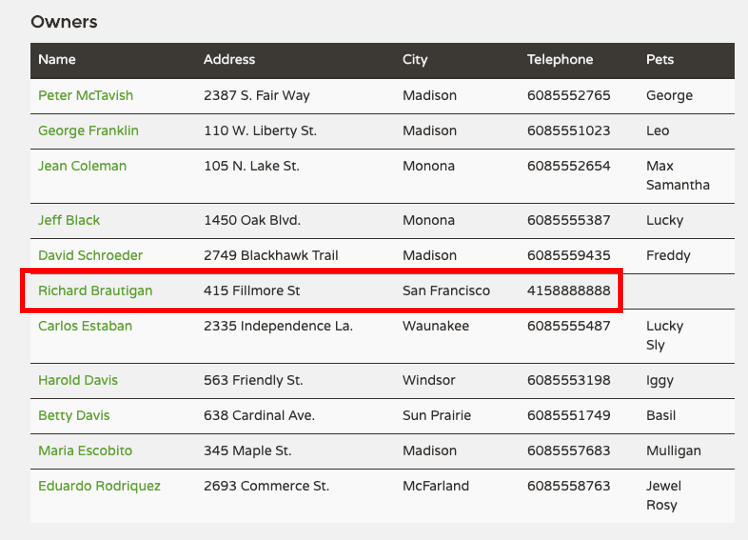
Similarly, the results you’d see in YugabyteDB.
Step 7: Simple data manipulation in Swagger
Navigate to https://localhost:9966/petclinic/swagger-ui.html and locate the pet-rest-controller.

Let’s add a pet named “Maxine” and assign her to the owner we just created named “Richard.” We can make a POST with the following:
{
  "birthDate": "2020/07/20",
  "id": 0,
  "name": "Maxine",
  "owner": {
    "address": "string",
    "city": "string",
    "firstName": "string",
    "id": 101,
    "lastName": "string",
    "pets": [
      null
    ],
    "telephone": "string"
  },
  "type": {
    "id": 2,
    "name": "string"
  },
  "visits": [
    {
      "date": "yyyy/MM/dd",
      "description": "string",
      "id": 0
    }
  ]
}
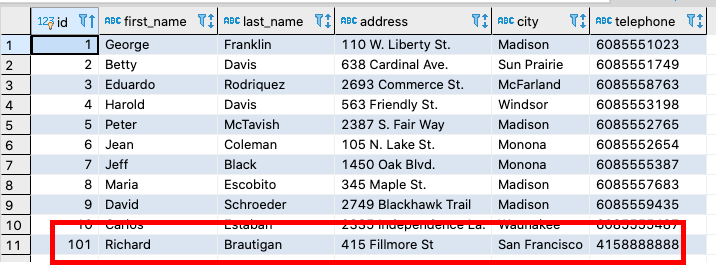
After execution, in the Angular UI we should see that the owner “Richard” now has a pet named “Maxine”. This tells us that the POST successfully inputted the data to YugabyteDB.

Conclusion
That’s it! You now have the REST version of the Spring PetClinic running on top of a 3 node YugabyteDB cluster on GKE, with an Angular frontend. For more information about how to build Spring applications with YugabyteDB backends, check the following resources:


