Getting Started with PostgreSQL’s Row Level Security in YugabyteDB
December 3, 2019
In this blog post we are going to introduce you to how PostgreSQL’s row level security feature works in the latest YugabyteDB 2.0.6 release. YugabyteDB supports RLS and a host of other security and encryption features “out-of-the-box,” as part of the open source distribution.
What’s YugabyteDB? It is an open source, high-performance distributed SQL database built on a scalable and fault-tolerant design inspired by Google Spanner. Yugabyte’s SQL API (YSQL) and drivers are PostgreSQL wire compatible.
What is Row Level Security?
Originally introduced in PostgreSQL 9.5, Row Level Security, or “RLS,” allows a DBA to set policies that restrict users from viewing or manipulating specific rows of data in a table. Depending on your use case, this can be especially useful in blocking access to especially sensitive records, like customer or financial data. This might be prompted by legal, liability or compliance concerns. As you might expect, RLS is a feature that you’ll also find in other enterprise RDBMs like SQL Server and Oracle.
RLS in Action
Before looking at an RLS example, make sure you have YugabyteDB installed and have the northwind sample database loaded.
In our simple example, we’ll create a policy that limits the emp4 role to only view records with the employee_id set to 4.
First, create the emp4 user:
CREATE ROLE emp4 WITH LOGIN PASSWORD 'password';
Next, grant the emp4 role select privileges on the orders table of the northwind database.
GRANT SELECT ON TABLE orders TO emp4;
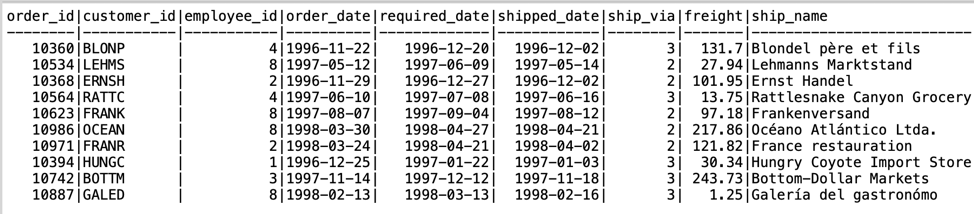
Now, logged in as the emp4 user we can do a simple select on the orders table. Note that emp4 is currently able to view the orders of multiple employees.
SELECT * FROM orders LIMIT 10;
Let’s enable RLS on the orders table of the northwind database.
ALTER TABLE orders ENABLE ROW LEVEL SECURITY;
Next, create a policy that limits emp4 to only view rows with the employee_id column set to 4.
CREATE POLICY employee_id_4_only
ON orders
FOR SELECT TO emp4
USING (employee_id = 4);
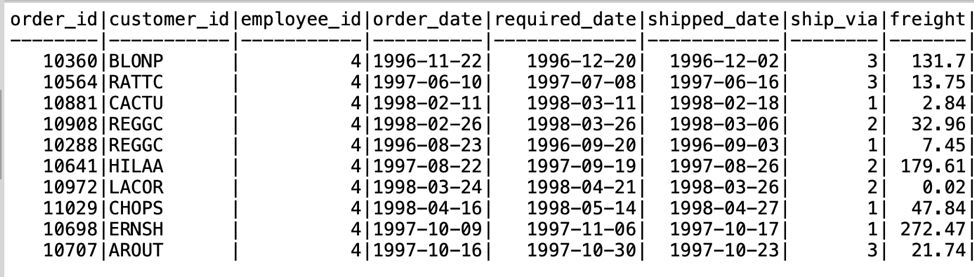
Now, when emp4 does a select on the orders table, notice they are only able to retrieve rows which have the employee_id set to 4.
SELECT * FROM orders LIMIT 10;
If emp4 tries to issue the following statement where they are explicitly trying to access rows that do not have the employee_id set to 4, notice they’ll get an empty result set.
SELECT * FROM orders WHERE employee_id = 2;

That’s it! You are now ready to start using RLS in more advanced scenarios inside of YugabyteDB.
NOTE: This example has been kept as simple as possible so as not to obscure the main point. In a realistic scenario, the application’s tables would not be owned by a superuser; nor would they be in the public schema. This would mean that some of the SQL statements would need schema-qualification and that you’d need to set the default schema for emp4.
What’s Next?
- Compare YugabyteDB in depth to databases like CockroachDB, Google Cloud Spanner and MongoDB.
- Get started with YugabyteDB on macOS, Linux, Docker, and Kubernetes.
- Contact us to learn more about licensing, pricing or to schedule a technical overview.


