Getting Started with YugabyteDB on Azure Kubernetes Service
May 11, 2020
Microsoft’s Azure Kubernetes Service (AKS) offers a highly available, secure, and fully managed Kubernetes service for developers looking to host their applications on containers in the cloud. AKS features elastic provisioning, an integrated developer experience for rapid application development, enterprise security features, and the most available regions of any cloud provider.

YugabyteDB is a natural fit for AKS because it was designed to support cloud native environments since its initial design.
What’s YugabyteDB? It is an open source, high-performance distributed SQL database built on a scalable and fault-tolerant design inspired by Google Spanner. Yugabyte’s SQL API (YSQL) is PostgreSQL wire compatible.
If your organization is looking to build an application that requires Kubernetes support, geo distributed data, high performance and availability, plus the familiarity of SQL, then YugabyteDB should be in the top on your shortlist of databases to use as a backend.
In this blog post, we’ll show you how easy it is to get started with YugabyteDB on AKS in just a few minutes. As a bonus, we’ll also show you how to deploy the familiar Northwind sample database.
Pre-requisites
Below is a list of the various components we’ll be installing and configuring for the purposes of this post:
- YugabyteDB version 2.1.4
- Kubectl version 1.18.0
- Helm version 3.1.0
- A Microsoft Azure account with “Pay As You Go” enabled
To get YugabyteDB up and running on an Azure Kubernetes cluster we’ll need to perform the following steps:
- Step 1: Install the Azure CLI
- Step 2: Create a resource group
- Step 3: Create a Kubernetes cluster
- Step 4: Install YugabyteDB
- Bonus: Install the Northwind sample database
Step 1: Install the Azure CLI
Before we create our Kubernetes cluster, let’s first install the Azure CLI on our local machine. To install the Azure CLI on your operating system follow the instructions in the link here.
On Mac, you can install the CLI via Homebrew with:
$ brew update && brew install azure-cli
Once installed, login at the command line with:
$ az login
…or open up a browser page at https://aka.ms/devicelogin and enter the authorization code displayed in your terminal. You should now be able to access the Azure Portal UI by going to https://portal.azure.com/.
Step 2: Create a Resource Group
To create a resource group, we’ll need to first choose the location where it will be hosted. Run the following command to retrieve a list of the available locations:
$ az account list-locations
For the purposes of this demo we are going to choose the “West US” location.
 {
    "displayName": "West US",
    "id": "/subscriptions/53f36dd9-85d8-4690-b45b-92733d97e6c3/locations/westus",
    "latitude": "37.783",
    "longitude": "-122.417",
    "name": "westus",
    "subscriptionId": null
  },
Next, create the resource group by running the following command using whatever location you decided on:
$ az group create --name yugabytedbRG --location westus

{
  "id": "/subscriptions/53f36dd9-85d8-4690-b45b-92733d97e6c3/resourceGroups/yugabytedbRG",
  "location": "westus",
  "managedBy": null,
  "name": "yugabytedbRG",
  "properties": {
    "provisioningState": "Succeeded"
  },
  "tags": null,
  "type": "Microsoft.Resources/resourceGroups"
}
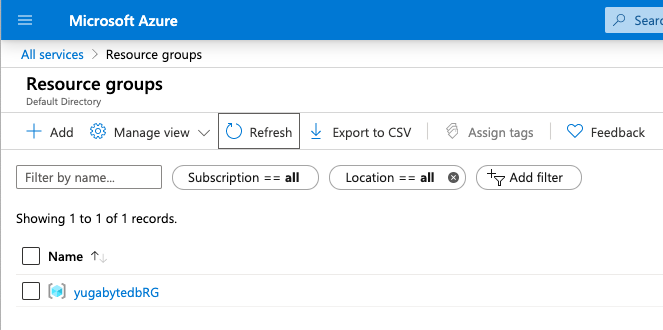
You should now be able to view the “yugabytedbRG” resource group in the Azure Portal by clicking on Resource Groups.
Step 3: Create the Kubernetes Cluster
We can now create our Kubernetes cluster by running the following command. Note that we have not specified any zones in the command below which means the AKS control plane components for the cluster will essentially be deployed in a single zone.
$ az aks create \
--resource-group yugabytedbRG \
--name yugabytedbAKSCluster \
--node-count 3 \
--node-vm-size Standard_D2s_v3 \
--enable-addons monitoring \
--generate-ssh-keys
The --generate-ssh-keys argument auto-generates SSH public and private key files that will be stored in the ~/.ssh directory.
You should see the following output:
Finished service principal creation[###################]  100.0000%
 - Running ..
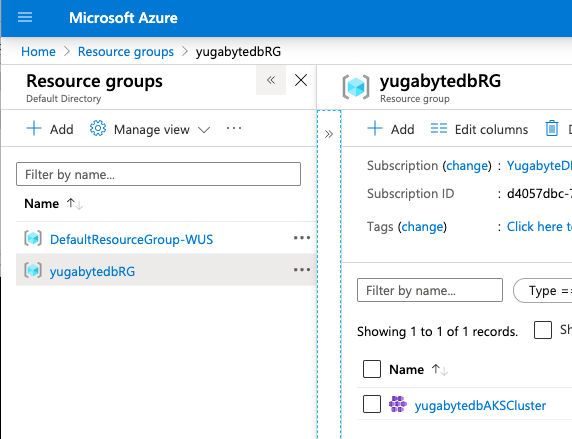
We should now see ”yugabytedbAKSCluster” in the UI.
To create the cluster and use your own ssh keys, run the following command:
$ ssh-keygen -t rsa -b 2048
Follow the prompts to create the id_rsa and id_rsa.pub files and note the location where they are stored. Now, execute:
$ az aks create \
--resource-group yugabytedbRG \
--name yugabytedbAKSCluster \
--node-count 3 \
--node-vm-size Standard_D2s_v3 \
--enable-addons monitoring \
--ssh-key-value <path_to>id_rsa.pub
Once the cluster is installed, point kubectl to the cluster by running the following command:
$ az aks get-credentials --resource-group yugabytedbRG --name yugabytedbAKSCluster
You should see output similar to:
Merged "yugabytedbAKSCluster" as current context in /Users/jguerrero/.kube/config
If you generated your own ssh-keys, point kubectl to the cluster by running the following command instead:
$ az aks get-credentials --resource-group yugabytedbRG --name yugabytedbAKSCluster -ssh-key-file <path_to>id_rsa
Verify that the cluster nodes are running using the following command:
$ kubectl get nodes
You should see output similar to:

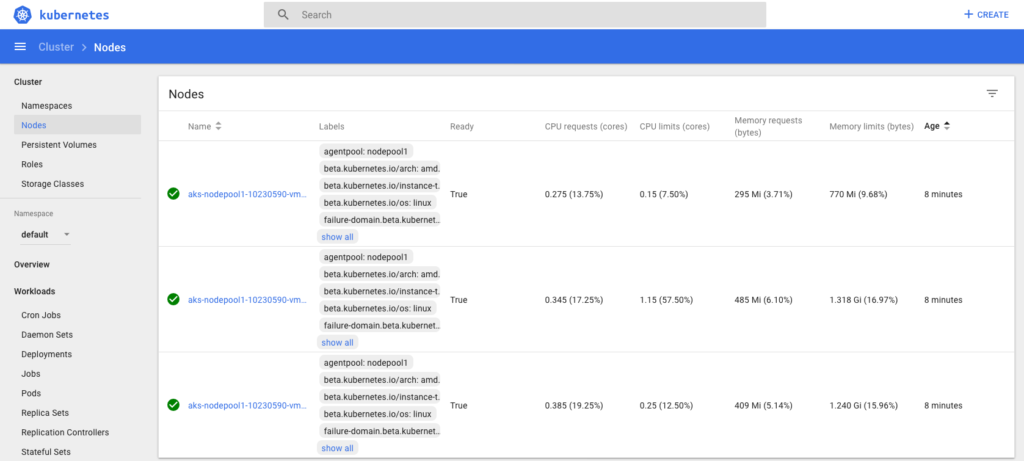
You can also view the details of the cluster in the Kubernetes Dashboard by running the following commands:
$ kubectl create clusterrolebinding kubernetes-dashboard --clusterrole=cluster-admin --serviceaccount=kube-system:kubernetes-dashboard

$ az aks browse --resource-group yugabytedbRG --name yugabytedbAKSCluster
Running the command above will open a browser window where you can view the Kubernetes dashboard:
Step 4: Install YugabyteDB Using Helm Chart
Now that we have our Kubernetes cluster up and running, we’ll need to perform the following steps to get YugabyteDB deployed:
- Add the YugabyteDB Helm repo
- Create a namespace
- Install YugabyteDB using Helm
Let’s first add the YugabyteDB repo by running the following commands:
$ helm repo add yugabytedb https://charts.yugabyte.com

"yugabytedb" has been added to your repositories

$ helm repo update

Hang tight while we grab the latest from your chart repositories...
...Successfully got an update from the "yugabytedb" chart repository

$ helm search repo yugabytedb/yugabyte

NAME               	CHART VERSION	APP VERSION	DESCRIPTION
yugabytedb/yugabyte	2.1.4        	2.1.4.0-b5 	YugabyteDB is the high-performance distributed ...
Create the yb-demo namespace.
$ kubectl create namespace yb-demo

namespace/yb-demo created
Next we’ll install YugabyteDB in the yb-demo namespace by executing the following commands to specify settings for resource constrained environments.
$ helm install yb-demo -n yb-demo yugabytedb/yugabyte \
--set storage.master.count=1 \
--set storage.tserver.count=1 \
--set resource.master.requests.cpu=0.5 \
--set resource.master.requests.memory=1Gi \
--set resource.tserver.requests.cpu=0.5 \
--set resource.tserver.requests.memory=1Gi \
--set resource.master.limits.cpu=0.8 \
--set resource.master.limits.memory=1Gi \
--set resource.tserver.limits.cpu=0.8 \
--set resource.tserver.limits.memory=1Gi \
--timeout=15m
Depending on your resources, it may take some time to get everything installed, deployed, and configured. Once the command prompt returns with success, let’s verify that the YugabyteDB pods are running using the following command:
$ kubectl get pods --namespace yb-demo

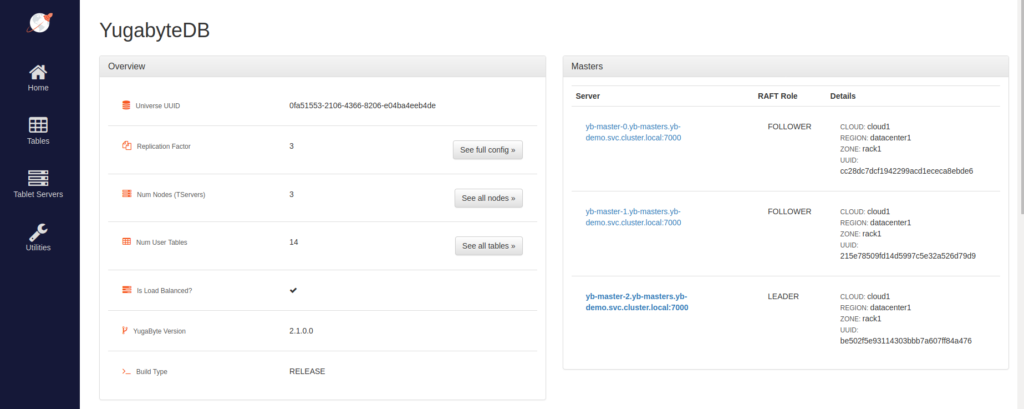
To access the Yugabyte Admin UI run the following command to locate the External IP entry associated with yb-master-ui and port 7000.
$ kubectl get services --namespace yb-demo
Now, go to https://EXTERNAL_IP:7000. Replace EXTERNAL_IP with your own. You should see the following:
Bonus: Installing the Northwind Sample Database
If you’d like to install a sample database and you are coming from the Microsoft or SQL Server world, the Northwind database is a familiar one to install and get started with.
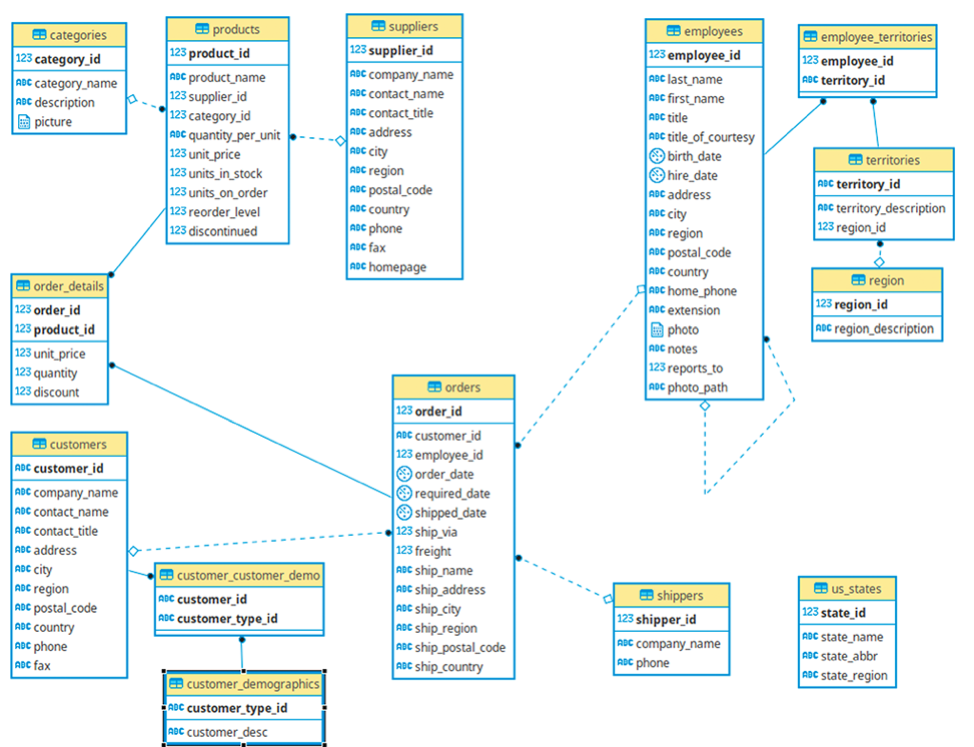
The following files that will be used to create and populate the example tables are already present on the YugabyteDB pods:
- Northwind_ddl: Contains DDL statements to create tables and other database objects.
- Northwind_data: Contains DML statements to load the sample data.
Connect to the YSQL shell by running the following commands:
$ kubectl exec -n yb-demo -it yb-tserver-0 /bin/bash

[root@yb-tserver-0 yugabyte]# /home/yugabyte/bin/ysqlsh -h yb-tserver-0.yb-tservers.yb-demo
Create the Northwind database and the tables by running the following commands from within the YSQL shell:
yugabyte=# CREATE DATABASE northwind;
CREATE DATABASE
yugabyte=# \c northwind
You are now connected to database "northwind" as user "yugabyte".
northwind=# \i share/northwind_ddl.sql
northwind=# \i share/northwind_data.sql
We can do a simple verification that the data has been inserted into the tables by running the following command:
northwind=# SELECT customer_id, company_name, contact_name FROM customers LIMIT 2;

Conclusion
That’s it, you now have YugabyteDB and the Northwind sample database running on an Azure Kubernetes cluster! At this point you are ready to start exploring YSQL’s capabilities. We recommend starting with the YSQL docs and then reading up on the YugabyteDB’s architecture and design goals.


